
How to Use Floor Groovers
Browse This Page
Work Sequence at a Glance
| Step | What to confirm |
|---|---|
| Confirm the Floor and Joint Requirement | Locate the exact floor product and its current installation guide. |
| Inspect the Tool and Fit the Approved Blade | For an electric groover, switch off, allow all moving parts to stop and unplug before blade inspection, installation or adjustment that requires access to the blade. |
| Set Up a Representative Test Joint | Make a coupon with the same flooring construction and seam arrangement. |
| Establish the Guide Before the Working Pass | Clear the planned route and arrange the cord and collected debris so they cannot disturb the tool. |
| Groove in Controlled Sections | Feed the tool in its specified direction, keeping its guides and support surfaces engaged. |
| Finish Ends and Clean the Joint | Finish inaccessible ends with a suitable approved hand tool, maintaining the same required groove rather than leaving a shallow section at the wall. |
| Record the Result and Maintain the Tool | Keep the material identification, blade code, accepted setting, coupon photographs and any repairs with the job record. |
Check the Groove Before Welding
Confirm the exact floor and required groove, inspect the tool and approved blade, then make a representative test joint. Check the groove profile and remaining layers before starting the floor. Continue only with stable guidance and finish inaccessible ends before the welding step.


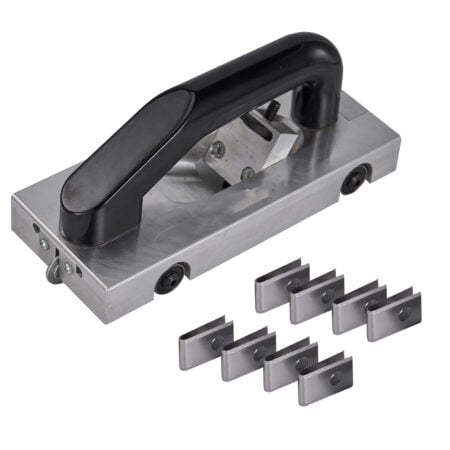
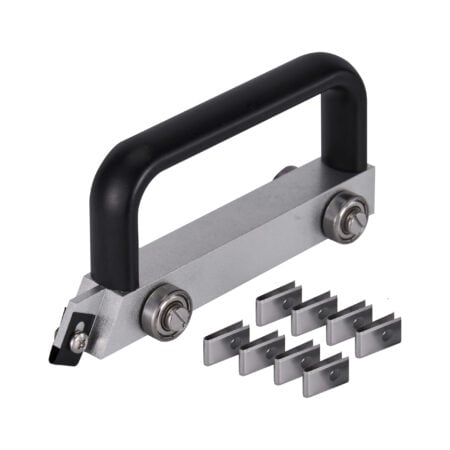


1. Confirm the Floor and Joint Requirement
Locate the exact floor product and its current installation guide. Record the adhesive stage, approved rod, groove profile and required depth for that construction. Check the fitted seam is correct and the sheet is stable before grooving. An acoustic backing or treated surface can change the instruction. If the floor or its build-up cannot be identified, pause the operation. Use this page to organise the work; the material guide determines the groove that the tool must produce.
2. Inspect the Tool and Fit the Approved Blade
For an electric groover, switch off, allow all moving parts to stop and unplug before blade inspection, installation or adjustment that requires access to the blade. Follow its exact manual. Check the approved blade, retention, guide rollers, guard and collection arrangement. For a hand groover, inspect the edge, holder and depth control before use. Never use a blade selected by appearance alone. Reject cracked blades, loose retention, damaged guards or guides that cannot maintain their reference.
3. Set Up a Representative Test Joint
Make a coupon with the same flooring construction and seam arrangement. Set the tool from the required material specification, then check the cut rather than trusting the scale alone. Use a short controlled pass and inspect a cross-section for width, profile, centring and remaining backing. Compare it with the material maker’s instructions. Mark the accepted setting and blade reference. If the groove reaches the wrong layer, wanders or has torn sides, correct the setup and make a new test.
4. Establish the Guide Before the Working Pass
Clear the planned route and arrange the cord and collected debris so they cannot disturb the tool. Position the documented guide in relation to the seam, with the tool supported as its manual requires. For a wheel-guided hand tool, check that the wheel follows the intended reference. For a plain hand groover, establish the permitted guiding method. Do not start an uncontrolled cut across the visible floor to reach the seam. Plan the entry, exit and near-wall finishing before operating.
5. Groove in Controlled Sections
Feed the tool in its specified direction, keeping its guides and support surfaces engaged. Let a powered cutter work at the approved feed rather than forcing it. Keep hands in the intended operating positions and outside the cut path. For hand tools, maintain a stable grip and a manageable stroke length. Watch the groove and stop if centring, sound, resistance or surface contact changes. On an electric tool, use the manual’s stop procedure and wait for blade run-down before moving or touching the cutting area.
6. Finish Ends and Clean the Joint
Finish inaccessible ends with a suitable approved hand tool, maintaining the same required groove rather than leaving a shallow section at the wall. Remove chips and debris without damaging the floor. Inspect the entire seam for missed sections, contamination and accidental overcutting. Do not begin welding until the groove meets the material instructions. If a section is damaged, obtain the material maker’s repair method; extra welding rod should not be used to conceal an unknown defect.
Two Checks Before the Working Seam
WOLFF’s manual calls for a trial groove and its specified blade arrangement. Altro’s tips give product-dependent groove requirements. Check the exact floor and tool together before entering the installed seam.
7. Record the Result and Maintain the Tool
Keep the material identification, blade code, accepted setting, coupon photographs and any repairs with the job record. Switch off and isolate the powered tool as instructed before cleaning or maintenance. Remove collected debris and check the guides and blade condition for the next use. Keep replacement blades labelled to the exact groover. If abnormal vibration, damaged parts or electrical problems appear, stop use and follow the documented service route rather than continuing with a slower feed.
How to Choose Floor Groovers Floor Groover and Blade Compatibility
Related Products and Guides
Preguntas frecuentes
Can I copy the depth from yesterday’s floor?
Only if the exact current flooring instructions and construction agree. Recheck the setup on a coupon.
What if the tool does not groove to the wall?
Use the approved detail tool and inspect the transition so the required groove remains continuous.
Can I adjust an electric groover while it runs?
Stop, wait for moving parts and disconnect power before the adjustments identified by its manual.
What information do you need for a wholesale quotation?
Send the product names or models, configurations, quantities and delivery destination. You can include mixing buckets, spreaders, spiked rollers and shoes in the same enquiry. The applicable quantity tier, packing details and order conditions will be reviewed for the selected items.
Can you customize the logo or packaging?
Send your logo artwork, preferred placement, packaging requirements and estimated order quantity. ARIK will review the available options for the selected tools and confirm the sample requirements, order conditions and quotation before production.
Can I request samples before a bulk order?
Include the models and configurations you want to evaluate, the intended application and the delivery destination in your enquiry. Sample availability, cost and shipping arrangements need to be confirmed for the selected items before an order is placed.
Obtenga su presupuesto ahora
- Póngase en contacto con nosotros para obtener un presupuesto personalizado.
- Ahorre más con nuestros precios directos
- Precios al por mayor competitivos.
- Sin intermediarios, mejores ofertas.

