
Cutting and Trimming Blade Compatibility
Browse This Page
Compatibility Checklist
| Check | What to confirm |
|---|---|
| Separate Sheet Cutting from Weld Trimming | State the work performed by the tool before identifying its spare blade. |
| Record the Exact Tool and Holder | Photograph the tool marking, model or order reference, holder and current blade. |
| Handle and Remove the Blade by Its Instructions | Secure the hand tool and protect yourself from the exposed edge. |
| Measure the Blade and Locating Features | Record overall length, width and thickness, then the distances from a defined end or edge to each hole, slot or locating notch. |
| Check Working Edge, Direction and Exposure | Match the cutting profile and sharpened side to the tool’s intended movement and material. |
| Keep the Trimming Guide with the Blade | Identify the trimming tool’s approved guide or spacer and the material’s trimming sequence. |
| Verify the Approved Replacement and Test Its Task | After the exact blade and holder pairing is confirmed, install it by the manual and check retention before a permitted offcut trial. |
Match the Holder and the Working Edge
Identify whether the spare cuts flooring or trims a weld, then record the exact holder and locating features. Match the approved blade, exposure and any working guide. Confirm retention before a permitted material trial; similar outlines are not a replacement specification.
| Selection point | What to check |
|---|---|
| Sheet cutting | Match the cutting holder and task |
| Weld trimming | Keep its blade and guide system |
| Replacement identity | Use the approved part reference |
1. Separate Sheet Cutting from Weld Trimming
State the work performed by the tool before identifying its spare blade. Cutting tools size, fit or separate sheet material; weld trimming tools remove excess joint material to a specified finish. A Hook Knife, push tool, seam knife, edge trimmer or strip cutter may also use a different blade system from the next cutting tool. Spatula Weld Trimming Knife e Crescent Weld Trimming Knife need their own inspection. Do not place all sharp parts in one universal replacement list.

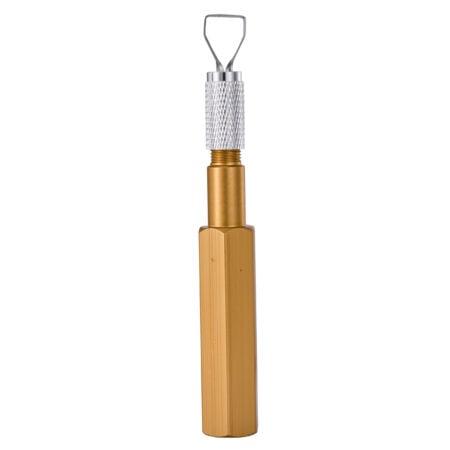

Explore 1. Separate Sheet Cutting from Weld Trimming
2. Record the Exact Tool and Holder
Photograph the tool marking, model or order reference, holder and current blade. Include both working and fixing sides where accessible. Vinyl Floor Cutter, Large Push Cutting Tool, Small Push Cutting Tool, Seam Cutting Knife, Wall Edge Trimmer, Cove Trimmer and PVC Strip Cutters are task families; identify the exact holder before choosing a replacement blade. Record any guide, cap or retaining part. Flooring Rulers and Triangular Flooring Squares are measurement, marking and cutting-reference guides. They are not replaceable-blade hosts.
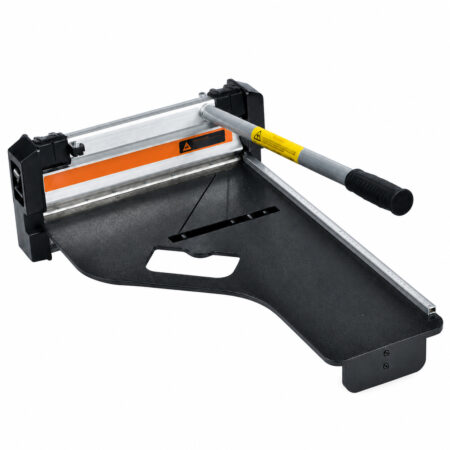


3. Handle and Remove the Blade by Its Instructions
Secure the hand tool and protect yourself from the exposed edge. On any powered or spring-loaded tool, use its specified isolation or restraint procedure before accessing the blade. Follow the documented blade-release method and retain the small locating or clamping parts. Do not force a blade free or reach across its edge. If the holder is damaged or the method is unclear, stop and arrange identification or service. A broken retaining component cannot be solved by a thicker blade.
4. Measure the Blade and Locating Features
Record overall length, width and thickness, then the distances from a defined end or edge to each hole, slot or locating notch. Photograph the measurements and units rather than writing approximate numbers from memory. Check the seating area, clamping length and exposed working edge. Include a drawing if a feature is difficult to show. Compare the approved part specification; worn or sharpened edges may no longer represent the original dimensions. Similar overall shape does not establish identical locating geometry.
5. Check Working Edge, Direction and Exposure
Match the cutting profile and sharpened side to the tool’s intended movement and material. A hook, straight edge and specialist trimming profile solve different contact problems. Check any permitted blade projection, guide relationship and cutting direction from the exact manual. For a replaceable trimming head, also identify its attachment and any spacer or guide. Do not infer safe exposure by copying another brand’s photograph. A retained blade still needs the correct working geometry to perform its task.
6. Keep the Trimming Guide with the Blade
Identify the trimming tool’s approved guide or spacer and the material’s trimming sequence. Changing the blade without the correct support can change the finished seam level. Keep preliminary excess removal and final flush trimming as separate requirements where the flooring system calls for them. Check the guide for wear or debris that could scratch the face or alter its support. A general sheet-cutting blade should not be substituted for a dedicated trimming blade just because its width fits inside the holder.
Locating Features and Trimming Guides Matter
Crain’s wall-trimmer manual identifies a dedicated blade and locating pin. MOZART’s trimming brochure separates blade and spacer. Record the holder features and guide arrangement as well as the cutting edge.
7. Verify the Approved Replacement and Test Its Task
After the exact blade and holder pairing is confirmed, install it by the manual and check retention before a permitted offcut trial. For cutting, inspect the cut edge and backing. For weld trimming, use a correctly welded coupon and inspect the final surface against the floor instructions. Stop if the blade moves, chatters or damages the material. Record the accepted tool, blade, guide and application together, then use that reference for Replacement Cutting Blades o Weld Trimming Blades enquiries.
Related Products and Guides
Domande frequenti
Can a trimming blade go in a similar cutting holder?
Only if the exact tool maker approves that blade and intended task; resemblance is insufficient.
Why measure hole positions as well as blade length?
The holder can rely on those features to locate and retain the blade.
Do Flooring Rulers need replacement cutting blades?
They are support tools in this selection. Confirm a product’s actual construction rather than treating every cutting accessory as a knife.
What information do you need for a wholesale quotation?
Send the product names or models, configurations, quantities and delivery destination. You can include mixing buckets, spreaders, spiked rollers and shoes in the same enquiry. The applicable quantity tier, packing details and order conditions will be reviewed for the selected items.
Can you customize the logo or packaging?
Send your logo artwork, preferred placement, packaging requirements and estimated order quantity. ARIK will review the available options for the selected tools and confirm the sample requirements, order conditions and quotation before production.
Can I request samples before a bulk order?
Include the models and configurations you want to evaluate, the intended application and the delivery destination in your enquiry. Sample availability, cost and shipping arrangements need to be confirmed for the selected items before an order is placed.
Richiedete ora il vostro preventivo
- Contattateci per un preventivo personalizzato.
- Risparmiate di più con i nostri prezzi diretti!
- Prezzi all'ingrosso competitivi.
- Nessun intermediario, offerte migliori.

