
How to Use Tape Marking Tools
Browse This Page
Work Sequence at a Glance
| Step | What to confirm |
|---|---|
| Identify the Tape’s Role | For finished marking tape, the tape remains as the visible line. |
| Check Surface and Tape Suitability | Identify the floor finish and select a tape approved for that surface and the intended duration. |
| Measure the Layout and Working Offset | Mark the required line using approved non-staining references. |
| Load and Adjust the Actual Applicator | Follow the exact tool’s threading diagram. |
| Apply Straight Runs and Curves Deliberately | For a straight run, guide the documented reference steadily and stop to check alignment before a long error develops. |
| Finish the Correct System | For finished marking tape, provide the recommended final contact and inspect ends, joints and corners before traffic returns. |
| Inspect, Record and Maintain | Measure the finished position and width against the approved drawing, inspect curve transitions and check the surface after any required tape removal. |
Decide What the Tape Will Do
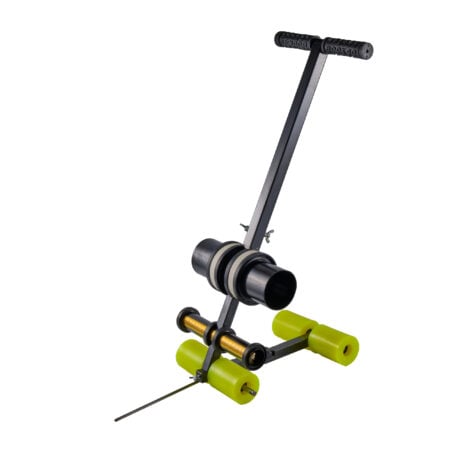
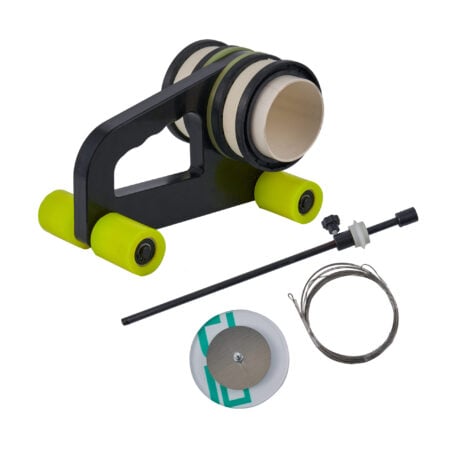
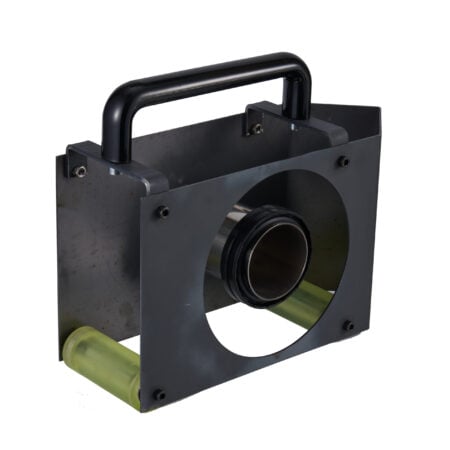
Separate temporary paint masking, finished marking tape and double-sided flooring tape before loading a tool. Confirm the surface, tape path and layout on a short trial. The ARIK flooring-tape applicator is not an assumed substitute for a dedicated finished-line applicator.
| Selection point | What to check |
|---|---|
| Finished marking tape | Leaves the tape as the visible line |
| Paint masking | Defines the edges of a painted line |
| Double-sided flooring tape | Bonds the specified flooring detail |
1. Identify the Tape’s Role
For finished marking tape, the tape remains as the visible line. Paint masking temporarily defines the edges of a coated line. Straight Line Tape Marker and Curved Line Tape Marker need their actual tape path, roll count and intended use confirmed. Floor Tape Applicators serves double-sided flooring tape for the specified bonding task. Keep that task separate. Use the approved court or traffic layout, and check the floor, tape and paint instructions before loading a marker.
2. Check Surface and Tape Suitability
Identify the floor finish and select a tape approved for that surface and the intended duration. Check the coating’s readiness before applying tape to a newly finished floor. Clean and prepare the area by the tape and floor manufacturers’ compatible method; do not introduce an unapproved solvent. Test application and removal in an inconspicuous area. Stop if the trial lifts the finish, leaves unacceptable residue or fails to bond. The applicator cannot make an incompatible tape safe for the surface.
3. Measure the Layout and Working Offset
Mark the required line using approved non-staining references. For finished tape, distinguish centreline, tape edge and the applicator’s guide edge. Measure the offset between the working guide and where the tape actually lands. For paint masking, verify both masking edges and the clear line width, including corners and intersections. Dry-run the route before loading if needed. Do not assume the wheel follows the final marked edge. A short test section should confirm the real geometry.
4. Load and Adjust the Actual Applicator
Follow the exact tool’s threading diagram. Check roll core, tape width, roll clearance, guides, tension and the contact roller. Centre or offset the roll only within the approved adjustment range. If the tool has two masking rolls, align their spacing and ensure both tracks contact correctly. If it applies finished tape, check that the feed does not wrinkle or steer. Make a short test on the approved area, then measure the laid position before starting the full run.
5. Apply Straight Runs and Curves Deliberately
For a straight run, guide the documented reference steadily and stop to check alignment before a long error develops. For a curve, use the tool’s permitted steering or radius arrangement and a tape designed for that curve. Slow down at changes of direction; do not stretch a tape to force an arc unless its instructions permit that method. Check both edges for lifting or creasing. At intersections, use the joint arrangement specified by the tape or paint system rather than inventing a splice.
6. Finish the Correct System
For finished marking tape, provide the recommended final contact and inspect ends, joints and corners before traffic returns. For masking, check both edges and the intended line width before painting. Apply paint and remove masking tape only according to the exact paint, floor and tape instructions, including any later protective finish. Do not borrow finished-tape overlap or return-to-traffic rules for painted court lines. If the line is wrong, correct the test or layout before committing to the next stage.
| Selection point | What to check |
|---|---|
| Finished tape | Check final contact and joints |
| Paint masking | Check width before coating and permitted removal |
| Flooring bond | Follow the separate adhesive system |
Tape Placement and Coating Removal Are Different Checks
3M’s M1 instructions measure the guide offset for finished tape. Bona’s advice addresses masking on coated floors. Test placement and removal with the exact system before committing to a long line.
7. Inspect, Record and Maintain
Measure the finished position and width against the approved drawing, inspect curve transitions and check the surface after any required tape removal. Record the tape, floor finish, tool setup and test result for repairs or repeat layouts. Protect and maintain the marking under its system instructions. Clean the applicator’s contact parts so later work does not transfer adhesive or grit. If steering, feed or retention becomes inconsistent, stop and correct the mechanical issue before laying another long section.
Related Products and Guides
Frequently Asked Questions
Does a curved-line tool work with any tape?
No. The tape must accept the intended curve and fit the applicator’s verified feed arrangement.
Does a tape marker paint the line?
Only a documented paint mechanism would establish that. Many tools apply tape or masking rather than paint.
When should masking tape be removed?
Follow the current instructions for the exact paint, tape and floor finish. Their conditions differ.
What information do you need for a wholesale quotation?
Send the product names or models, configurations, quantities and delivery destination. You can include mixing buckets, spreaders, spiked rollers and shoes in the same enquiry. The applicable quantity tier, packing details and order conditions will be reviewed for the selected items.
Can you customize the logo or packaging?
Send your logo artwork, preferred placement, packaging requirements and estimated order quantity. ARIK will review the available options for the selected tools and confirm the sample requirements, order conditions and quotation before production.
Can I request samples before a bulk order?
Include the models and configurations you want to evaluate, the intended application and the delivery destination in your enquiry. Sample availability, cost and shipping arrangements need to be confirmed for the selected items before an order is placed.
Get Your Quote Now
- Contact us for your personalized quotation.
- Save more with our direct pricing!
- Competitive wholesale prices.
- No middleman, better deals.

