
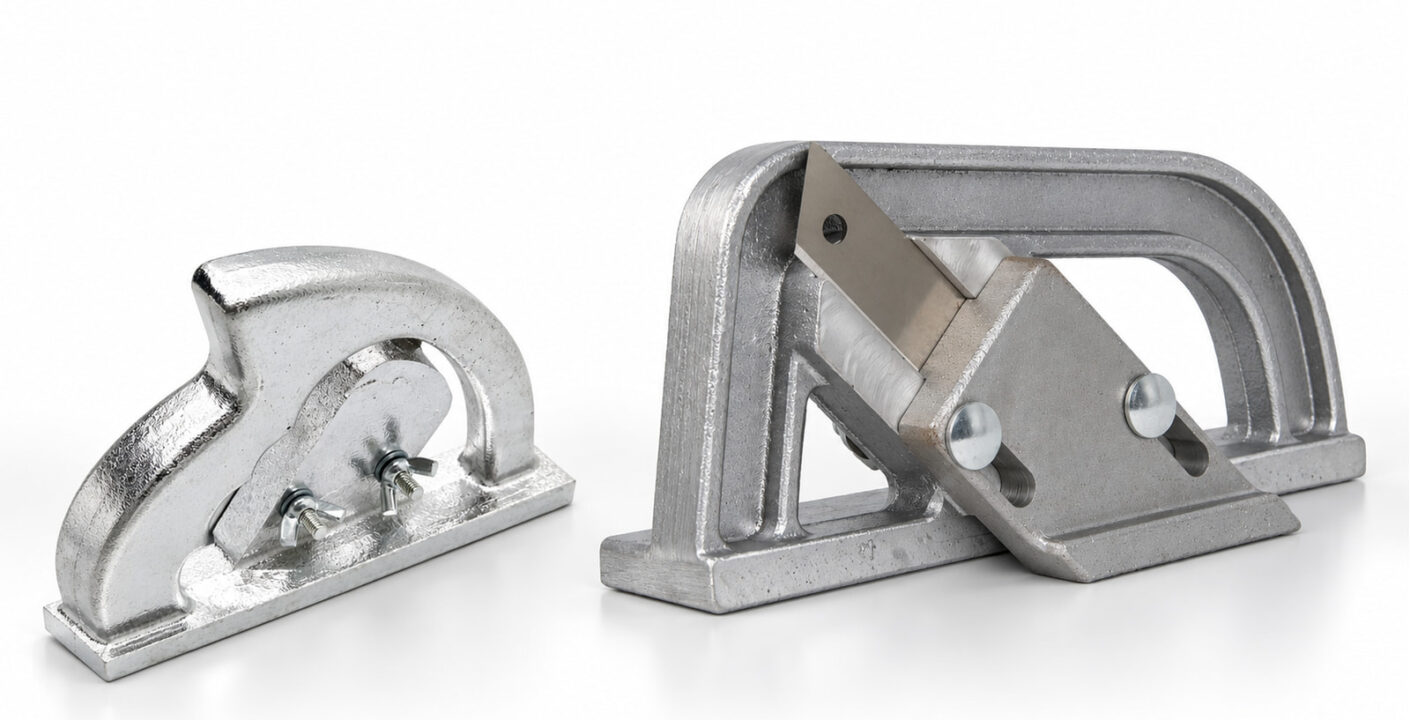
A large vs small vinyl floor push cutter comparison is useful when it helps a buyer decide which model to sample, stock and supply. Put both cutters beside the same piece of sheet vinyl. Check whether each body fits the work area, whether the installed blade suits the cut, and whether the supplier can deliver the configuration that passed the trial. The small model is lighter in the product records. Working clearance, edge quality and replacement blade fit still need to be checked on the samples.
Use one sample sheet per model. Record the tool as received, test both cutters on the same material, and carry the approved model and blade details into the purchase order. That gives the receiving team a clear reference when production units arrive.
Start With Model Identity and Comparable Measurements
Identify the small vinyl floor push cutter as the NLTDX sample and the large vinyl floor push cutter as the NLTDD sample. Photograph each body, base and blade holder with its sample label in view. Add the supplier’s exact item code and version from the quotation or carton so they can be matched to the delivered units.
The product records list the small model at 160 mm long, 55 mm wide and 80 mm high, with a recorded net weight of 0.5 kg. The large model is recorded at 195 mm long, 50 mm wide and 140 mm high, with a recorded net weight of 0.8 kg. On that basis the small body is shorter, lower and 0.3 kg lighter, and its width field is 5 mm greater. That width is worth checking if the cutter must run beside a fixture or along a narrow guide.
Older listing figures differ from some of these records. Use the numbers to plan what to measure. For order acceptance, record the measurements of the actual samples using the same definitions on both cutters. Stand both tools on their bases. Label the direction of travel as length, the side-to-side span as width and the vertical distance from the base as height. Photograph the measurement points and state whether the blade is fitted. Weigh the tools in the same assembly state and record packed weight separately.
If a guide or fastener protrudes, record the widest point that matters for the cut as well as the body measurement. For a shelf or carton requirement, measure the pack with its actual protective materials and included parts. Keep the sample weight, operating clearance and packed dimensions in their own fields so the people quoting freight and evaluating the tool use the right figures.
Check the Space the Tool and Hand Need
Set up one open cut and one restricted cut from the work you expect customers to do. The open cut provides a baseline for both sizes. The restricted cut might start beside a fixed panel or finish close to a wall. Reproduce the available space with the tool on a supported offcut, keeping the blade path clear. A body can fit into the gap while the operator’s grip or the handle still needs more room to finish the stroke.
- Grip clearance. Check where the operator can hold the tool during entry, across the line and at the exit. Record the spot where a handle, hand or projecting part first runs out of room.
- Base contact. Check whether the cutter stays flat against the sheet and follows the guide in the intended position. Look for rocking when the cutter is near the edge of the support.
- Blade access. Check where the blade actually enters and exits with the tool seated. Use that observation to decide whether the model can complete the planned cut near the obstruction.
- Carrying setup. If installers carry several tools between rooms, compare the measured tool weights and check how each cutter is stored and protected in the kit.
Body size helps you assess handling. Check cut quality and material suitability on the target sheet. If the intended work also includes irregular openings, repeated strip widths or seams that need a dedicated cutter, use the guide on how to choose vinyl floor cutting tools to match each task to a tool before setting your assortment.
Compare the Cut on Matching Pieces of Flooring
Use pieces from the same flooring product and, where practical, the same roll or lot. Record the flooring product, thickness, backing and the edge that the installer needs to keep. Mark equivalent lines on both pieces and use the same support and guiding conditions. Check where each blade sits relative to the guide first. The two bodies can contact the guide differently, so establish the offset for each tool before comparing how closely the cuts follow the intended line.
Fit only a blade approved for each holder. Use equivalent blade profiles and edge condition where the two tools allow it. If the models require different blade references, record both and evaluate each tool with the blade you expect to order. That difference belongs in the sample record because it affects the complete cutter configuration the installer will receive.
Have the same operator make the common cut with both tools, then repeat it on fresh pieces. Use a short trim and a representative longer pass if both tasks matter to customers. Note entry and exit clearance, any lifting or shift of the sheet, and whether the blade followed the mark between those points. Record the push as a practical observation, such as steady travel or a catch at a specific point, so another installer can reproduce the setup.
Review the retained edge from the face and backing, then inspect the sacrificial surface for marks. Check for a rough start, drift through the middle, a tear at the exit and any damage that would affect the installed fit. Agree on the acceptable edge and fit for that flooring system. Keep the labeled test pieces or photos with the sample record so buyers can compare later deliveries with the same reference.
Specify What Must Arrive With Each Model
Ask the supplier to tie each quotation line to the approved sample and the exact blade reference. Confirm how the blade seats, which fasteners are fitted, whether a working blade is installed and what spares are included. Confirm availability and ordering details for replacement blades separately from the list of pieces in the box. If the supplier proposes a change to the blade, holder or fasteners, request a fresh sample of that configuration for approval.
For private label flooring tools, give the two sizes distinct item codes and pack labels. Attach the approved marking location and artwork where applicable. State which instructions, blade protection, spare blades and packaging are included for each code. Confirm packed weight and carton quantity from the approved packed sample. These details help the warehouse distinguish visually similar items and put the matching replacement blade with the correct tool.
A usable order line identifies the exact cutter and version, the approved sample reference, the blade reference and quantities, and the agreed packing configuration. If both sizes ship together, state the quantity by model and how the cartons will be marked. At receiving, compare the carton label, product identity and blade hardware with the sample record, then repeat a representative cut from the approval trial on the agreed inspection sample.
Choose the Model by the Work It Passed
Approve the small model for the jobs where its measured clearance and sample cuts meet the requirements. Approve the large model for the jobs where its grip and base contact suit the available work area and the trial edge passes inspection. If both pass the same work, carrying weight, buyer demand and the ability to supply the correct blades will help determine what to stock. Send the supplier both sample records when requesting a quote for the pair, along with your target flooring, order quantities and required packaging.
